Many IoT smart devices including Dusun’s smart home sensors can be connected and operated through these Apps. This guide will show how to connect Dusun’s Gateway and smart devices.
Table of Contents
IoT Resources Library
Including IoT development kits, implementation reference documents, and the newest advances of the internet of things. To help more developers do more flexible applications on their IoT projects.
A Guide on connecting Dusun’s gateway and smart devices through smartphone Apps
Dusun’s Gateways support many IoT cloud platforms and corresponding smartphone applications. Many IoT smart devices including Dusun’s smart home sensors can be connected and operated through these Apps. This guide will show how to connect Dusun’s Gateway and smart devices.
Many IoT sensors are hardware resource-constrained, operated at low power mode and have no setup interfaces. These IoT sensors or devices are often transfer sampled data and setup data to and from cloud platforms via an IoT Gateway. An IoT gateway bridges the communication gap between IoT devices, sensors, equipment, systems, and the cloud. Then a smartphone IoT application may be a convenient and fast way to connect and set up these devices. Dusun’s Gateways support many IoT cloud platforms and corresponding smartphone applications. Many IoT smart devices including Dusun’s smart home sensors can be connected and operated through these Apps. This guide will show how to connect Dusun’s Gateway and smart devices.
1. Flashing Gateway
There are many cloud platforms which provide services for customers to connect their IoT devices. A way to connect the devices to these cloud platforms is through Dusun’s Gateway. Dusun’s gateway integrates with a specific program which can connect a specific cloud platform.
If customers want to connect a specific platform which they choose with Dusun’s gateway, they should flash a specific firmware corresponding to the platform into the gateway. The following steps show how to flash the gateway with a firmware which customers can request from Dusun.
Figure 1. gateway→PC connection diagram
Connect the gateway to the PC and power up, according to figure 2;
Open a web browser on PC, Input Gateway IP Address: 192.168.66.1;Enter the username and Password (Username: root Password: root), login to the gateway(Figure2)
Enter the “Backup/flash” menu (figure 3), upload a new firmware image to replace the running firmware(figure 4).
Figure 2. Login interface
Figure 3. Backup/Flash firmware menu
Figure 4. Flash firmware operations
2.Connecting devices with Apps
After flashing the gateway with image corresponding to a specific platform, IoT devices can be registered and controlled through an App which is provided by the platform vendors. We will show you how to connecting Dusun gateways and smart sensors to Tuya platform with Tuya App in the following part.
Device registration with Tuya App.
1) Flash the gateway with the image corresponding to Tuya platform.
2) Download and install Tuya App. Go to the Android app market or app store, search for “Tuya smart”, download and install it on the phone.
A
B
Figure 5. Connect status of the gateway
Figure 6. Adding gateway procedure on the App
3) Add Gateway on the App.
Power on the gateway, connect it to the internet by inserting the Ethernet cable to the WAN port (Figure 5-A). Connect the mobile phone to the same network, the gateway green light, and the red light will be on (Figure 5-B). Open the Tuya APP, click” Add Devices” on the home page (figure 6-A); choose “others”, click’ Gateway(ZigBee)’ (Figure6-B); then jump to the add device page as figure6-C, Click: ‘confirm CONFIG IND on (green) ‘, start connect gateway (figure6-D); wait 2-3 minutes to find the gateway, then click the connecting button (figure 6-F). If the gateway red light is off and the green light is on, the gateway is added successfully (Figure 7).
Figure 7. The gateway status after being added
Figure 8. Adding a sensor interface on the Tuya App
4) Add and configure Dusun Lock on the App.
At first, click on the “Manage added devices” of the gateway; Click “Security & sensors”; then click “Lock (Zigbee)” (figure 8). Secondly, click the “Confirm indicator is flashing” button and then wake up the door lock (figure 9-A), the door lock starts to pair with the gateway.
After the pairing procedure is done, the lock is added. Click “done” (Figure 9-B), the door lock details page will be shown. We can configure the lock and check its status on the page. If one wants to add a passcode to the lock, one can enter a 6-digit password in the input passcode box and click the send button on the right side of the input box (Figure 10-A). If the passcode is sent successfully and the door lock receives the password, the input box will display “success” (Figure 10-B). Deleting password and change password can also be done similarly(Figure 11/12. Other configuration including setting seed, getting the dynamic password and others can be done also easily.
Figure 9.
Figure 10. Adding password to the lock
Figure 12. Changing password of the lock
5) Add a PIR Motion sensor and check its status.
At first, click “Manage added devices” of the gateway, then click “Add Sub-Device” to enter the Add Sub-Device page, select “PIR Sensor”, enter the Add Device page (figure 13). Secondly, power on the sensor, poke the pairing hole for 3s and confirm that the indicator light below the device is flashing (Figure 14).
If the pairing is successful, the ‘Add Device Success’ page will be shown. Enter the motion sensor details page, one can check the power of the PIR and whether an object is detected to move (0 is not detected, 1 is detected, as shown in Figure 15)
Figure 14 Power on the sensor and pair it with gateway
Figure 15 Check the status of PIR sensor
6) Add and check a temperature and humidity sensor.
At first, click “Manage added devices” of the gateway, then click “Add Sub-Device” to enter the Add Sub-Device page, select ” Temperature and Humidity Sensor “, enter the Add Device page (figure 16). Secondly, power on the sensor, poke the pairing hole for 3s and confirm that the indicator light below the device is flashing (Figure 17). If the pairing is successful, the ‘Add Device Success’ page will be shown. Enter the sensor details page, one can check the data sensor reported including temperature, humidity and battery level (Figure 18)
Figure 16 temperature and humidity sensor adding interface
Figure 17 Poking the pairing hole of the temperature sensor
Figure 18 The temperature and humidity sensor status
7) Add and check a water leakage sensor.
Similar to the temperature and humidity sensor, one can add a water leakage sensor to the App. After adding successful, one can check the status of the water leakage sensor. (Figure 19).
8) Add and check a door contact sensor.
Similar to the PIR sensor, one can add a door contact sensor to the App (Figure 20/21). After adding successful, one can check the status of the Door status that sensor reported. (Figure 22).
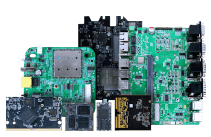
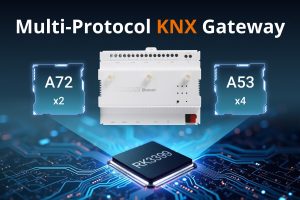
The DSOM-090M System on Module (SOM) core board is equipped with MTK’s MT7621A processor supporting OpenWRT OS, which includes a dual-core MIPS1004Kc running at a
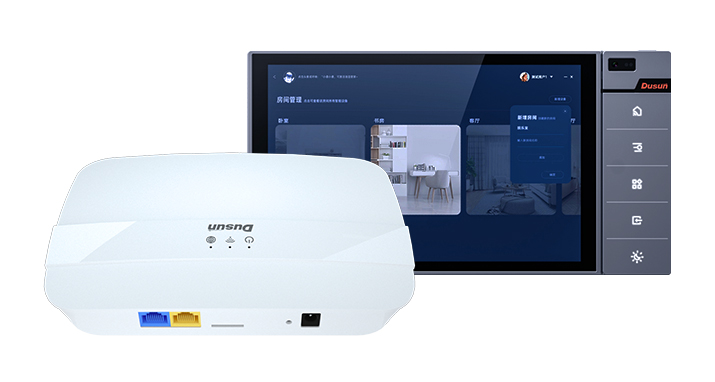
Dusun IoT presents an wall-mounted touch screen smart home controller featuring Zigbee and Wi-Fi capabilities. Designed for seamless integration, it fits effortlessly into an 86-type
The zigbee window door sensor monitors the opening and closing status of entry points, and sends alerts to the alarm system when necessary. Surface-mounted. ODM/OEM
December 18, 2023
Looking For An IoT Device Supplier For Your Projects?
We use cookies on our website to give you the most relevant experience by remembering your preferences and repeat visits. By clicking “Accept”, you consent to the use of ALL the cookies.
This website uses cookies to improve your experience while you navigate through the website. Out of these, the cookies that are categorized as necessary are stored on your browser as they are essential for the working of basic functionalities of the website. We also use third-party cookies that help us analyze and understand how you use this website. These cookies will be stored in your browser only with your consent. You also have the option to opt-out of these cookies. But opting out of some of these cookies may affect your browsing experience.
Necessary cookies are absolutely essential for the website to function properly. These cookies ensure basic functionalities and security features of the website, anonymously.
Cookie
Duration
Description
cookielawinfo-checkbox-analytics
11 months
This cookie is set by GDPR Cookie Consent plugin. The cookie is used to store the user consent for the cookies in the category "Analytics".
cookielawinfo-checkbox-functional
11 months
The cookie is set by GDPR cookie consent to record the user consent for the cookies in the category "Functional".
cookielawinfo-checkbox-necessary
11 months
This cookie is set by GDPR Cookie Consent plugin. The cookies is used to store the user consent for the cookies in the category "Necessary".
cookielawinfo-checkbox-others
11 months
This cookie is set by GDPR Cookie Consent plugin. The cookie is used to store the user consent for the cookies in the category "Other.
cookielawinfo-checkbox-performance
11 months
This cookie is set by GDPR Cookie Consent plugin. The cookie is used to store the user consent for the cookies in the category "Performance".
viewed_cookie_policy
11 months
The cookie is set by the GDPR Cookie Consent plugin and is used to store whether or not user has consented to the use of cookies. It does not store any personal data.
Functional cookies help to perform certain functionalities like sharing the content of the website on social media platforms, collect feedbacks, and other third-party features.
Performance cookies are used to understand and analyze the key performance indexes of the website which helps in delivering a better user experience for the visitors.
Analytical cookies are used to understand how visitors interact with the website. These cookies help provide information on metrics the number of visitors, bounce rate, traffic source, etc.
Advertisement cookies are used to provide visitors with relevant ads and marketing campaigns. These cookies track visitors across websites and collect information to provide customized ads.